If you want to take the beauty of your home to the next level, then using pavers is an excellent idea. Pavers not only improve the appearance of your home but also its curb appeal. The most common use of pavers can be seen in patios, backyards, and porches. Just imagine how you would feel when a wonderful lineup of pavers is ready to welcome you all the time. That’s why if there ever was a time to install pavers, then it is now because summer is just perfect for such an addition. Stop wondering how to lay pavers on dirt. Just contact the best contractors for pavers for a quick installation today.
You can also use pavers around your pool area and create an outdoor kitchen as well. In short, with the right amount of money in hand, there’s no limit to what you can achieve. If you haven’t gotten a good buyer for your home yet, then try installing pavers and making your home desirable. You’ll get the best deals ever. There are several options when it comes to the pavement and you are usually advised to pick from terracotta, charcoal, crisp whites, etc. The selection of pavers also depends on the type of environment you have, and if you have no idea how to select an appropriate style, then get in touch with an expert today. If you want to install pavers all by yourself, then below you can find a detailed guide to learn how to install pavers on dirt.
Prepare the Patio Area
When you are ready to start your paving project, then it is essential that you start by preparing the working area. Preparing the work area is mandatory and allows you to focus on that particular part of the backyard and makes it easier to control variables. The best way to do it is to do it like a professional and mark the boundary line with paint or string. Marking the area is also needed to calculate the right number of pavers you’d need. Since pavers aren’t that cheap, make sure that you gather the data accurately for such calculations. If you don’t know how to find out the number of pavers, then talk to the store you are buying pavers from.
The best and quickest way to complete paving work is to work with professionals. Professionals are miracle workers because they not only have skills but experience as well. They have seen countless projects and finishing yours quickly would be no different for them. In addition, they are well aware of the paver handling because if you are careless, you can crack the pavers during work. This would save you money and extra effort as well. However, if you want to take on this summer project yourself, then you need to go shopping and buy some necessary tools. Some of them you might already have, but make sure you either buy or borrow the rest of the tools before you start. The items needed are listed below.
- Pavers
- Tape measure
- Shovel
- rake (with metal prongs).
- Plate compactor
- Wheelbarrow
- Bedding sand
- Base layer (road base)
- Paver cutting equipment
- Spirit level
- Mortar
- A rubber mallet
- Drill
- Grub hoe
- Paving sealer
- Cleaning liquid
- Cleaning brush for pavers
Clear Out Grass and Soil
Clearing out the installation or work area is how you start the work. If you are interested in installing pavers in your backyard or even front yard, the growth of grass is quite common to experience. That’s why it's important that you clear the area before you start the work. Otherwise, the pavers will not be balanced and the installation quality will be greatly reduced. Another common issue that arises if you don’t remove the grass and soil at the beginning is the excessive growth of grass underneath that eventually ruins the work quality. That’s why it is absolutely essential that you pick up the grub hoe and get rid of the grass for good.
Once the grass is removed, it is important that the area is leveled up, and the best way to do it is to dig it up to a certain depth. Usually, professionals recommend going 7 inches deep. If you are unsure how to maintain this depth, then you can place markers before you start the work and keep checking if the surface is level. When you are done with the excavation, you are finally ready to start the installation work.
Level the Paver Base With Sand
Now that you have done the basic work, it is time to get in the grooves. That’s right because there’s much to be done before you can start placing the pavers. The surface must be ready to accept the pavers, and for that, you are going to level it with the rake. Repeat the process several times if necessary. If you are unsure how to work this part out, then you can watch a few professional videos online as well. Afterward, it is time to introduce the wheelbarrow to deliver a smooth base. Once that is finished, wet the surface and use a plate compactor to compact the base layer to make sure it is ready to accept pavers. Finally, it is time to spread bedding sand of about 3 inches in depth.
Consider Edging Stones or Paver Edging
Now that the working or installation area is fully prepared, it is time to lay down the basic look. Professionals usually prefer to work with the edging idea because it offers more stability. However, that’s not always necessary and you can work your own way as well. Edging defines the boundaries of the work area and secures the pavers from disorientation in case the pavers experience extreme external pressure. It also gives the patio a unique look, and a lot of people simply love it. However, that’s not the only way to lay down pavers. You can go along with your own scheme and make patterns as you please. If you don’t have an idea about pattern schemes, then you might want to talk to the retailer you are buying pavers from, or professional assistance can be hired as well.
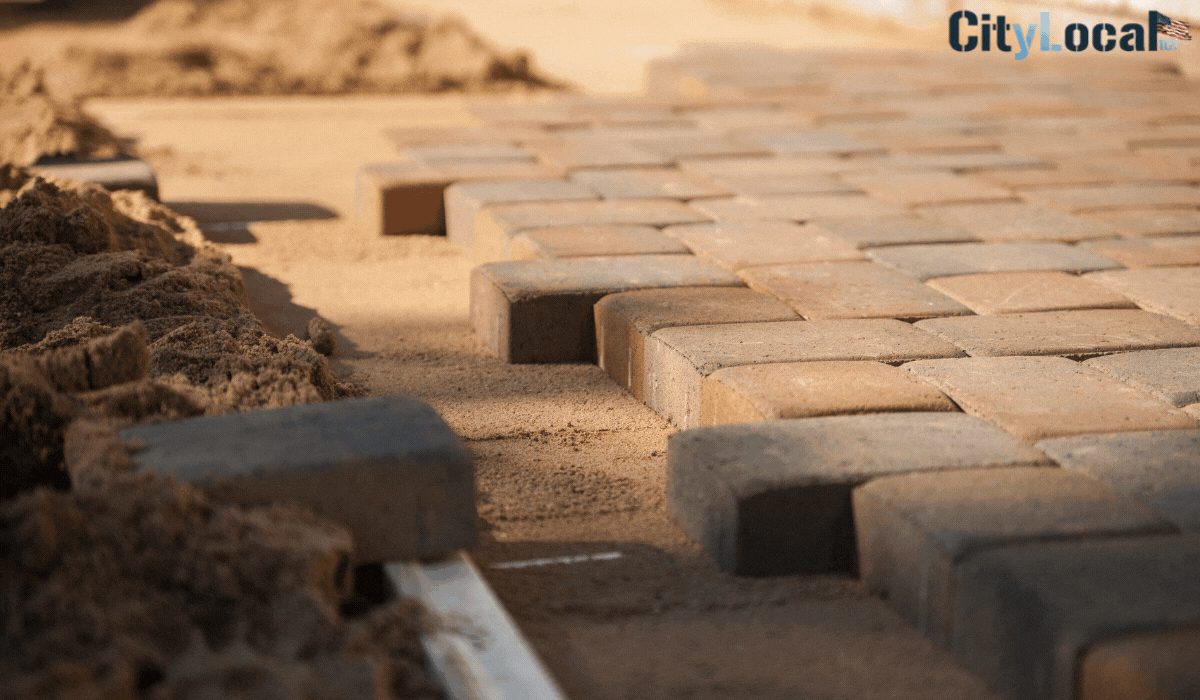
Place the Paver Stones
After successfully finishing the previous step, you can finally start the paving work officially. Start working in a line and begin placing pavers. If you want to ensure accuracy and perfection, then use a mallet to knock the paver in place and use level spirit to frequently check the overall balance. Make sure you add some mortar of about 30 mm before you place the first paver. Leveling is the key to successful paving; keep knocking with the mallet until you are satisfied. Keep wiping the pavers to remove dry mortar from the pavers. Continue the process until you finish paving the work area, and don’t forget to maintain a 5mm gap between two rows of pavers.
If your design is edgy and requires special paver sizes, then make sure you have a suitable cutter for that. When the work is finished, it is time to do the pressure wash to remove the debris and seal the pavement. That’s right, once the pavement is cleaned up well, use the sand sealer and spread it all over the pavers. Leave it there for some time and finish the work once the sealer has settled down.